To track a line of credit (LOC) extended to your business, create a liability account with an opening balance of zero in your Chart of Accounts.
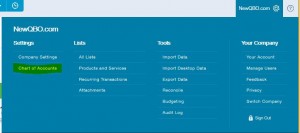
From the Home page screen
- Go to the Company Gear (right upper corner)
- Select Chart of Accounts under Settings header
- Select the blue “New” button (right corner)
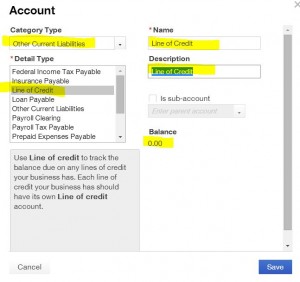
- A new “Account” information screen will open
- Category Type = Other Current Liabilities
- Detail = Line of Credit
- Name = Line of Credit (or Chase Line of Credit if preferred to name the bank)
- Description Line of Credit (or same as name)
- Balance = Leave opening balance as “0” (zero even if you’ve already used LOC and have balance. It’s better to enter the transaction later.)
- Click the “Save” button
To record (for example $100,000.00) the LOC extended to your company and deposited to the main Checking account:
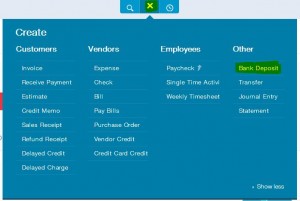
From the Home page screen
- Go to Create “+” sign (top middle)
- Deposits under the “Other” header
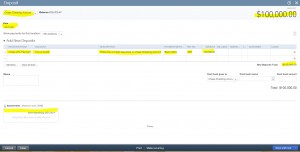
- Ensure the proper Deposit to the account is selected (in this example, Chase Checking Account)
- Date = Enter bank posted date
- Go “Add New Deposits” section
- Received From = Chase LOC Payment (Add New as Vendor if needed)
- Account = Line of Credit (Select the “Line of Credit” account just created as “Other Current Liabilities) from the Account drop-down arrow)
- Description = For example, Chase line of credit deposited to Chase Checking Account
- Payment Method = Bank Online or appropriate (add new if needed)
- Ref Number = Enter the last four digits of the LOC number (optional)
- Amount = $100,000.00
- Attachments (paper clip icon) = Upload picture of related document (if available)
- Click the “Save and New or Save and Close” blue button
This entry will show you have added $100,000 as a deposit to Chase Checking Account and $100,000 as a liability to the Chase LOC account.
To record just interest charges (in this example $500 interest charges) applied to the LOC by your financial institution:
See instructions below for making Principal and Interest Payment.
From the Home page screen
- Select the blue navigation bar on the left
- Select Transactions
- Select Registers
- Locate Line of Credit Account register
- Double click Line of Credit Account
- Liability for Line of Credit screen will open
- Enter the date of the interest charge (for example 4/30/2014)
- Financial institution name where the line of credit is held as the Payee (in this example Chase LOC Payment)
- Enter the interest charge in the Increase column (in this example $500.00)
- Choose the Interest Expense account from the “Account” drop-down arrow
- Enter “Memo” as Interest Expense for the period (in this example for April 2014)
- Click Save

To record repayment of the LOC and/or payment of interest charges:
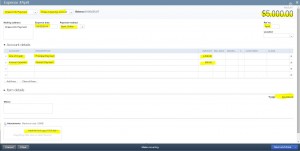
(In this example making a $5,000 LOC payment from Chase Checking Account ($4,500 principal and $500 interest)
From the Home page screen
- Select Create “+” sign
- Select “Expense” (if paid Online) or Select “Check” (if issued Check) under the Vendors header. In this example, we are making an online payment.
- Click the LOC Account as Payee from the drop-down arrow (“Chase LOC Payment” in this example)
- Choose the bank account you want to make payment from (“Chase Checking Account” in this example)
- Expense Date: = Payment Date (for example 4/30/2104)
- Payment Method: = Bank Online
- Under Account Details, click the drop-down arrow and choose the “Line of Credit” account (Other Current Liabilities type),
Under Description = Principal Payment
Under Amount = $4,500.00 - On the second line, Under Account Details, click the drop-down arrow and choose the “Interest Expense” account (Expenses type),
Under Description = Interest Payment
Under Amount = $500.00 - Make sure total payment is $5,000.00
- Attachments (small paper clip icon, bottom left): Upload the photo of the LOC statement. Optional but recommended.
- Click Save and New or Save and Close button
To enter a payment that has been made directly from the LOC to a vendor, where no bills have been entered:
In this example, we are making a $10,000 payment to Simon Manufacturing for purchased materials.
From the Home page screen
- Select the blue navigation bar on the left
- Select Transactions
- Select Registers
- Locate Line of Credit Account register
- Double click Line of Credit Account
- Liability for Line of Credit screen will open
- Enter the date of the purchase (for example 4/30/2014)
- Name of Vendor Payee (in this example Simon Manufacturing)
- Enter the amount in the Increase column (in this example $10,00.00)
- Choose Purchases Expense Account from the “Account” drop-down arrow
- Enter “Memo” as Buying Materials (for example XYZ job)
- Click Save
NOTE: This transaction will not show up on the Vendors Center record. For to show transactions recorded on Vendors Center, see the three-step process below.

To pay bills where funds have gone directly from the line of credit to the Vendor Entered Bill as Accounts Payable:
This involves three steps process.
Step # 1 Enter Vendor Bill
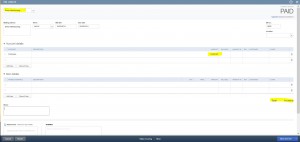
From the Home page screen
- Select Create “+” sign
- Select “Bill” under Vendors header
- Select Vendor = Simon Manufacturing
- Date = 4/30/1014
- Under the Account Details column, select Account = Purchases Expenses Account for example
- Amount = $10,000.00
- Click Save and Close button
This entry will create Accounts Payable balance of $10,000.00 in Simon Manufacturing’s account
Step # 2 Write Journal to show a payment to the Vendor by LOC
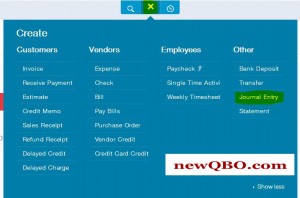
From the Home page screen
- Select Create “+” sign
- Journal Entry under Other
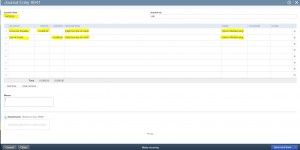
- Enter the date (for example 4/30/2014)
- On the first line, click the Account drop-down arrow and select Accounts Payable
- Under the Debit column, enter the amount ($10,000 in this example) you paid the vendor
- Enter a memo such as “Paid from the line of credit”
- Under Name, click the drop-down arrow and select the vendor you paid (“Simon Manufacturing” in this example)
- On the second line Under Name, click the Account drop-down arrow and select the line of credit account (“Line of Credit” in this example)
- Under the Credit column, enter the amount you paid the vendor ($10,000 in this example)
- Enter a memo such as “Paid from the line of credit”
- Click Save and Close
Step # 3 Now you need to link the bill payment to the vendor credit paid by LOC:
From the Home page screen
- Select Create “+” sign
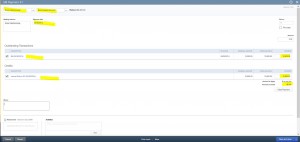
- Select “Pay Bills” under the Vendors header
- Under Pay to the Order, select the vendor name (Simon Manufacturing)
- Under Choose an account for Bank, Select Bank Clearing Account (Add new if needed. This account will always have zero balance.)
- The screen will refresh and you’ll see a matching amount under Credits and Bill Payment Information. Click the checkboxes so the amounts match.
- Leave the amount blank as “0.00” zero. It’s an “In and Out” entry, so the amount should be zero
- Click Save and Close button
This entry will clear Accounts Payable and will show payment transactions on Vendor Center.
| If you found our answers useful then please contribute a few bucks to support this forum. Thank you! |